


Have you missed us?? Sorry about just falling of the face of the Earth. We all got a little swept up in our lives for a while. I'm sure you can relate. In order to continue with our blog, but not overwhelm ourselves, we've decided this blog is going to be a low volume blog for a while. We'll post ideas when we have them, and give you time to peruse other sites when we don't. Just as we can't get 5 posts up a week, we figure you probably can't get 5 projects done in a week. :-)
I truly underestimated the amount of work 3 small kids and a house on the market would be. And Chelsea is finishing up her last semester on her MFA and getting ready for her final show. And Deborah just started a new job. So we're busy, no doubt...and looking forward to when the day comes that we have more time to blog!
Now see below, as Deborah has a great post about an adorable dress she made for Miss Heidi Sage.
************************


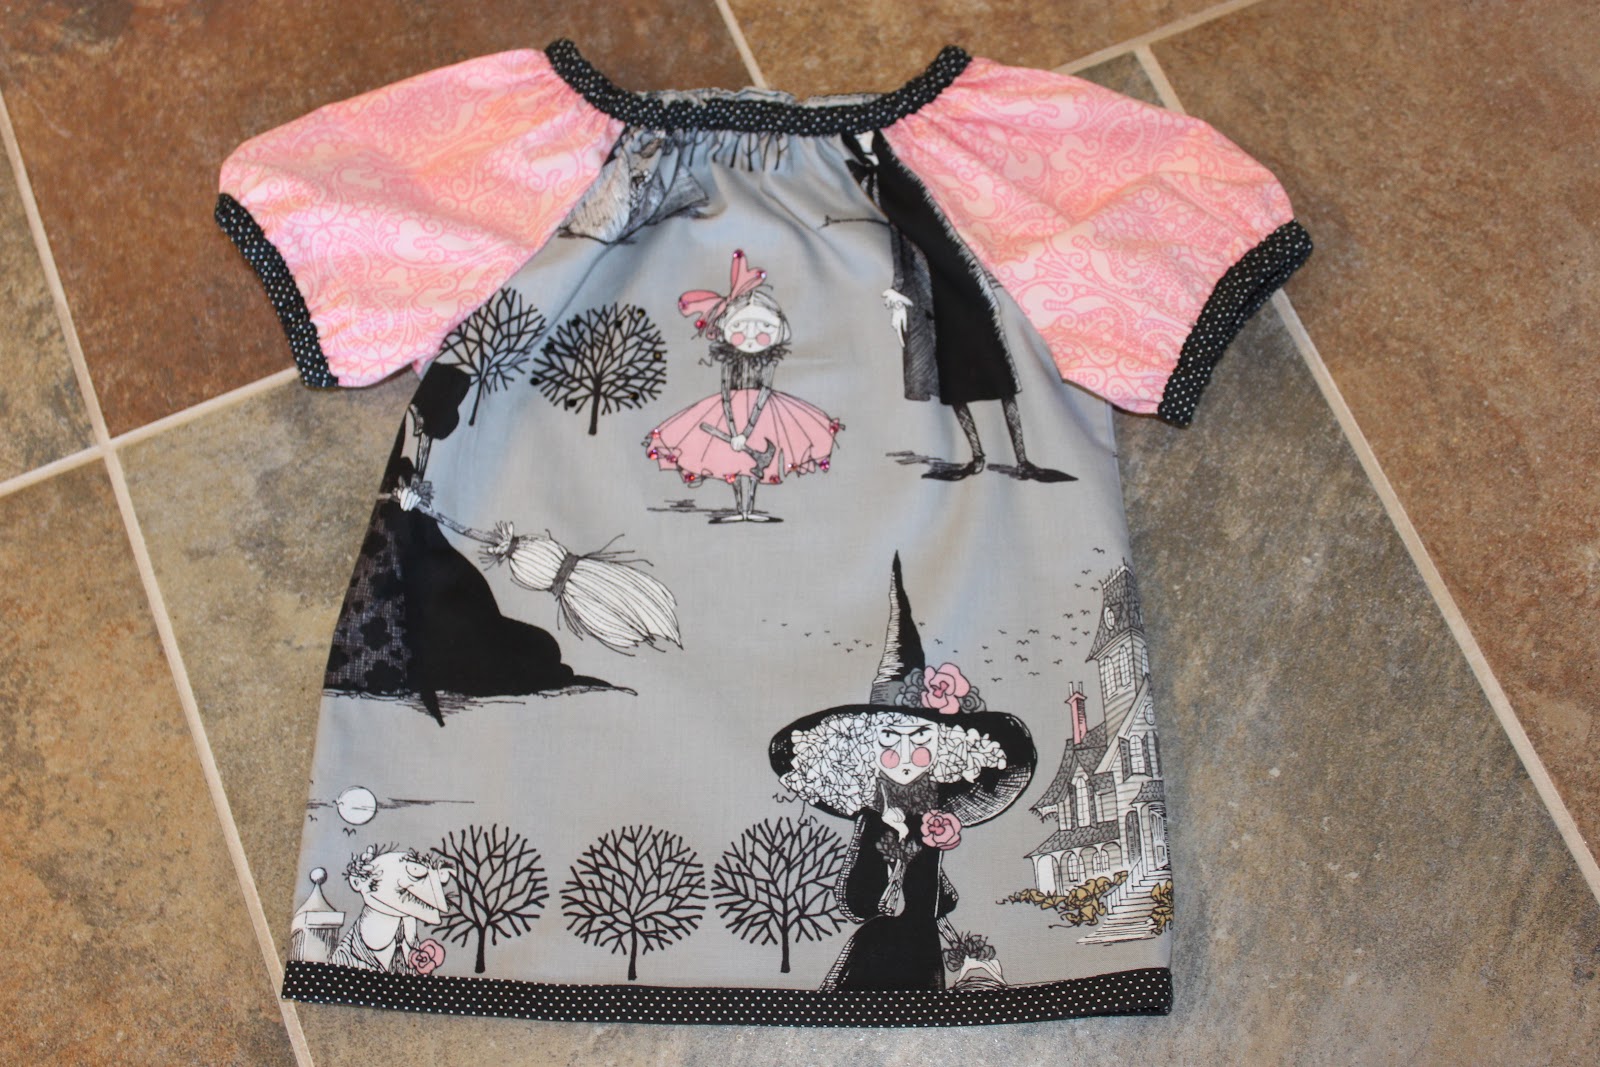
Not sure if you remember, but Heidi Sage had quite the Halloween wardrobe last year. And last year we went with the typical black/orange/white color combo. But THIS year, we decided to mix it up a bit and got with pink and black....she is a girl, after all.
Chelsea found this fabric at City Craft and the pattern at Poppy Patterns. I have used this pattern several times for Heidi Sage. The pattern has three different sleeves. For Heidi Sage I used the Bell Sleeve and for Emery (who also got a tiny version of this dress) I used the Short Puffed Sleeve. My mom also helped me make these dresses.

This is a very simple to dress to make. Very good for the novoice sewer. Hint Hint, Courtney. Chelsea chose three fabrics. The main part of the dress will be gray, the sleeves are pink and all the bias strips will be black.

We made several different sizes of bias strips.

The front/back dress is one pattern piece.

The sleeve makes the second pattern piece.

Pin the sleeves to the front and back of the dress and sew together. This pattern comes with well written instructions for construction...no reason for me to go recreating the wheel, so to speak.


Sew the side seams.

This is the bias piece for the sleeve that makes the bell.

Top stitch to sleeve and add the elastic. The pattern does not show this version. I added this for decoration. The pattern gives you measurements for the elastic lengths.

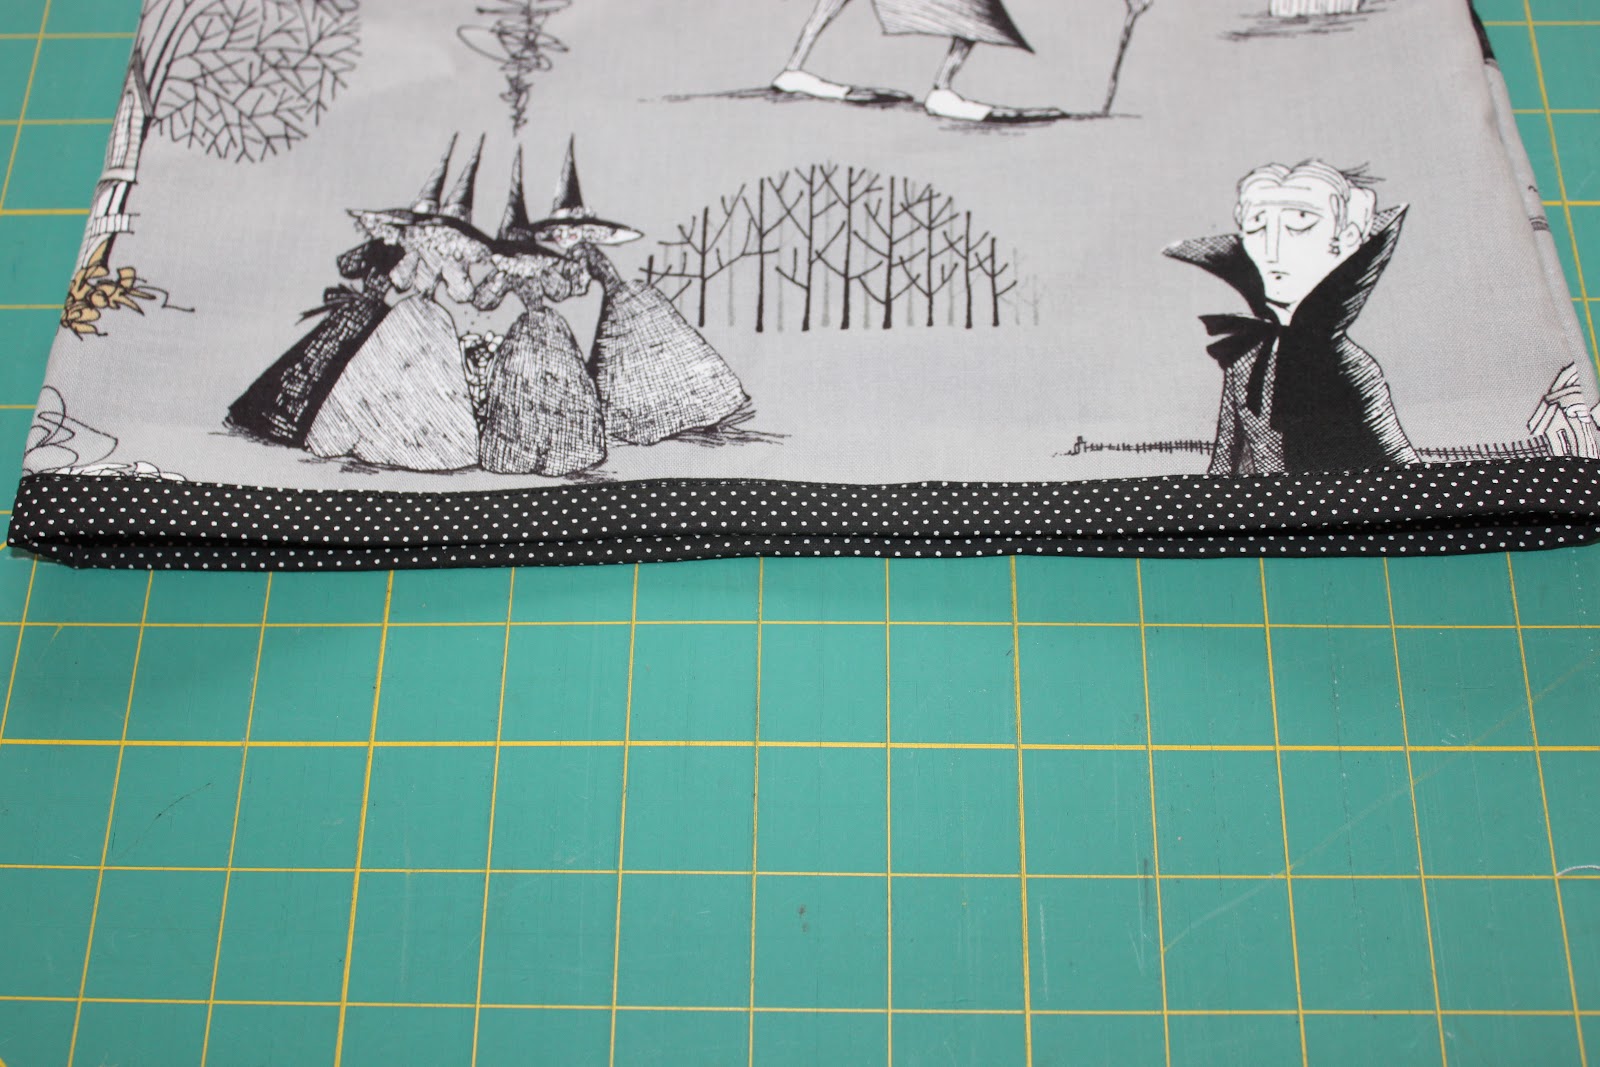
Also added bias to bottom for decoration.

I also added bias to the neck. The pattern shows how to make a casing by folding the fabric to the inside.


This is a picture of the finished hem.
Added some sparkles to the front of the dress using my Candy Cane.


Ready for Heidi Sage.

This is little Emery's dress.
Happily Haunting!

Linking to...


3 Shout Outs:
Oh, I LOVE this!! I've never seen pink Halloween fabric, I'm going to visit that store and check it out! Just darling!!
These dresses are super cute! I love the witch fabric!
This is a great post, thanks
Post a Comment