Showing posts with label Kids Crafts. Show all posts

Tuesday, June 7, 2011

Simply Entertained

You may have noticed things have been a bit slow over here.  Maybe it seems we've gotten lazy.  Maybe it seems we're dropping the ball.  The reality, however, is that we're super busy.

Deborah just started a new job, so her blog time has been minimal.  She has been working on her garden, though.  And even has some guest projects from her mother, our Grammy.  Those should be posted shortly.

Chelsea is in Europe.  She's been attending fashion shows, meeting designers, and other dreamy things.  She'll be back in the states in July, so it may be a while before we hear from her.  Hopefully, she'll have some amazing things to share with us when she gets back.  I enjoy living vicariously through her.

And I have my house on the market.  UGH!!!  Cleaning house has never been my strong suit, but it's especially hard when the expectations are for it to be spotless....while tending to three children under five.  And I have about decided my kids have it out for me.  While I'm in one room cleaning up one mess, they're usually in another room making another one.  It's a vicious cycle...and I may surely lose my mind.

The past couple of days I have dared to make a bit of a mess here and there, but only ones I could clean up very quickly should someone call for a showing.

Yesterday we painted rocks for our pumpkin patch.  Painting rocks is one of Clinton's favorite things to do.  And all was going well until Heidi Sage decided to start painting the patio furniture, the chair cushions, and the deck.  Oh well...at least she's cute...


Today we made cupcakes.  To simplify and keep it easy we used a box mix and canned frosting.  They don't taste quite the same to a distinguished palette, but the kids do not care one teeny tiny bit.  To make them extra special, I got out my super fancy Ziploc sandwich bags, filled them with icing, cut off a tiny corner, and swirled the icing.  I let the kiddos take care of the sprinkles...


Hope you're keeping busy this RIDICULOUSLY hot summer!

Tuesday, February 22, 2011

The $2.99 Canvas

In case you've missed the memo about my love affair with brown craft paper, here's another post about its absolute usefulness and versatility.  I get mine at Hobby Lobby.

As I've said before, I use the brown craft paper to wrap all of my gifts.  It makes for a neutral background that I can then pretty up with some graphic ribbons or theme stickers.

Another use for it is as a "canvas".  I tend to get overwhelmed with the constant making of crafts that A.) serve no real purpose; and B.) need to find a home in my house because I feel too guilty about throwing a "project" away.  

So I decided to find something creative my kids could do that I didn't feel guilty about trashing, BUT it took up time AND allowed them to be creative.

I took my said roll of craft paper, rolled it out, covered my dining room table, and taped it down.  **We have a hand-me-down table with some kind of survive-all surface, so if you have a nice table you might want to do a double layer of paper.**

The first day, we got out markers and I just let the kids color all over the table.  I sat with them and drew pictures upon request.  I also drew shapes for Heidi Sage to name, and wrote Clinton's name in block letters for him to fill in as he is learning to write his name.  To my surprise, Clinton made his very first attempt at drawing our family!  I, of course, could not throw this away...so I cut this part off and intend to find a way to display it in our house.


We let the marker drawings sit for a couple of days.  When the kids began to act interested again, we got out paints.  I just let them paint all over the top of what they had colored.  Clearly, I am not a Type A person.

And after a few days of admiring their paint job, the kids got interested again.  So yesterday we ventured in glue.  I dumped some Mod Podge in a container and gave them each a paint brush for application along with fun stuff for gluing...buttons, pom poms, sequins, glitter, etc.

And then today, I pulled what pieces of their creative activities I wanted to keep.  I put away all the supplies.  And I took our big piece of paper, wadded it up, and threw it in the trash.  And it felt good.

All in all, I give the project two thumbs up.  There was no TV involved.  My kids were being creative.  And I didn't feel bad about throwing out most of the project.

**UPDATE**  As you may notice in the comments, Samantha had a great idea!  Instead of wadding up the paper and throwing it out, use it as wrapping paper!  Brilliant!

Colored, painted, and glued,

Sunday, February 20, 2011

Story Time with a Twist

I have a confession to make.  I don't read to my kids as often as I should.  Yes, we read.  But it probably doesn't meet whatever the current guidelines are for daily readings.

Part of this is because we're so busy I sometimes just forget.  Part of this is because Clinton gets burned out quickly.  And part of this is because the kids and I can't always agree on what we're going to read.

Heidi Sage likes anything with ducks, ladybugs, butterflies, or monkeys.  Clinton likes only things to do with heavy machinery or fire trucks.  And I like the books that have a rhythm and rhyme.

One thing Clinton and I both enjoy is making up stories.  But this can often get stagnant as the same story gets told over and over, and Heidi Sage doesn't like it because there are no pictures.  So, I started thinking...

What's an easy way to still make up stories but also provide a visual?  Umm...Shadow puppets!  

To make these all I did was think of a few initial characters as you can see below.  I went to Google and typed in, for example, "Elephant Silhouette".  Then I selected one under images, dragged it to a Word file, and printed it on card stock.


I then cut them out and taped lollipop sticks to the back.  You could also use crayons, pencils, popsicle sticks, or whatever else you might have on hand.  (But I will say, the lollipop sticks worked perfectly.)

Then we got out a flashlight.  We started out by practicing projecting the images on the wall.  I showed Clinton how to make them bigger and smaller by moving them closer and further from the light.  We talked about how it has to be in the path of the light.  And we discussed why things even have a shadow in the first place.

Once we had our projecting down, we started using them to tell stories.  Heidi Sage loved naming all the characters/images as they hit the wall.  Clinton enjoyed making up sentences to go along with whatever images we put up.  The best part is I can add or rotate through new images to keep the stories new and fresh.  I look forward to seeing what adventures we will have...

Now for a little catch up.   THANK YOU to all of you who voted for Chelsea's wedding dress.  She won the Knock-it-Off contest at 733blog.blogspot.com by 3 votes!  


We realize we've been a bit absent this week, but we've all been busy.  Chelsea was in Vegas for some type of fashion convention.  I was...well...uh...I have three small children for Pete's sake...I'm always busy!  :-)  And Deborah was working on some super cute new duds for the littlest of our fans...

Coming Soon... lots of new onesies tutorials!

Welcome back to Monday!

Linking to...
Making

Wednesday, December 29, 2010

Don't Throw Out Your Christmas Cards!

I tried something this year that turned out to be a great idea.  I didn't want to blog about it until I knew for sure, but now I know...

While you're putting away your Christmas decor (as I have been working on for the past two days!), don't throw out those cards your friends and family have so lovingly picked out, signed, and sent to you. Instead, just put them away with your Christmas decorations.  Rubber band them together and put a sticky note on them that says, 

"Visit dressingheidisage.blogspot.com for a reminder of what to do with these."  :-)  

We'll do a more in-depth "how-to" next November.

I used them to decorate my Christmas packages.  There are two different ways you can go here. 

You can use die cuts, as you see below.  OR you can find some that have cute graphics that are easy to cut out and use those.  This is a great way to "recycle", but also a way to save some moo-lah next year when you start purchasing gift wrapping supplies.

I have a couple of rules about Christmas wrapping.  First, ALL gifts must coordinate.  Some call it OCD, others (...and by "others", I mean BRILLIANT people) think it makes for an amazing looking present presentation.  Second, I wrap all my gifts in brown craft paper.  Again, this could be seen as OCD, but I like it because I like my decorations to stand out...and again, it helps make them all coordinate.  When other people start mailing in packages or bringing them in, I can sometimes take a deep breath and allow a different paper under my tree...but I've also been known to rewrap other people's gifts...of course, that was back in the day before I had three children under the age of 4.  :-D

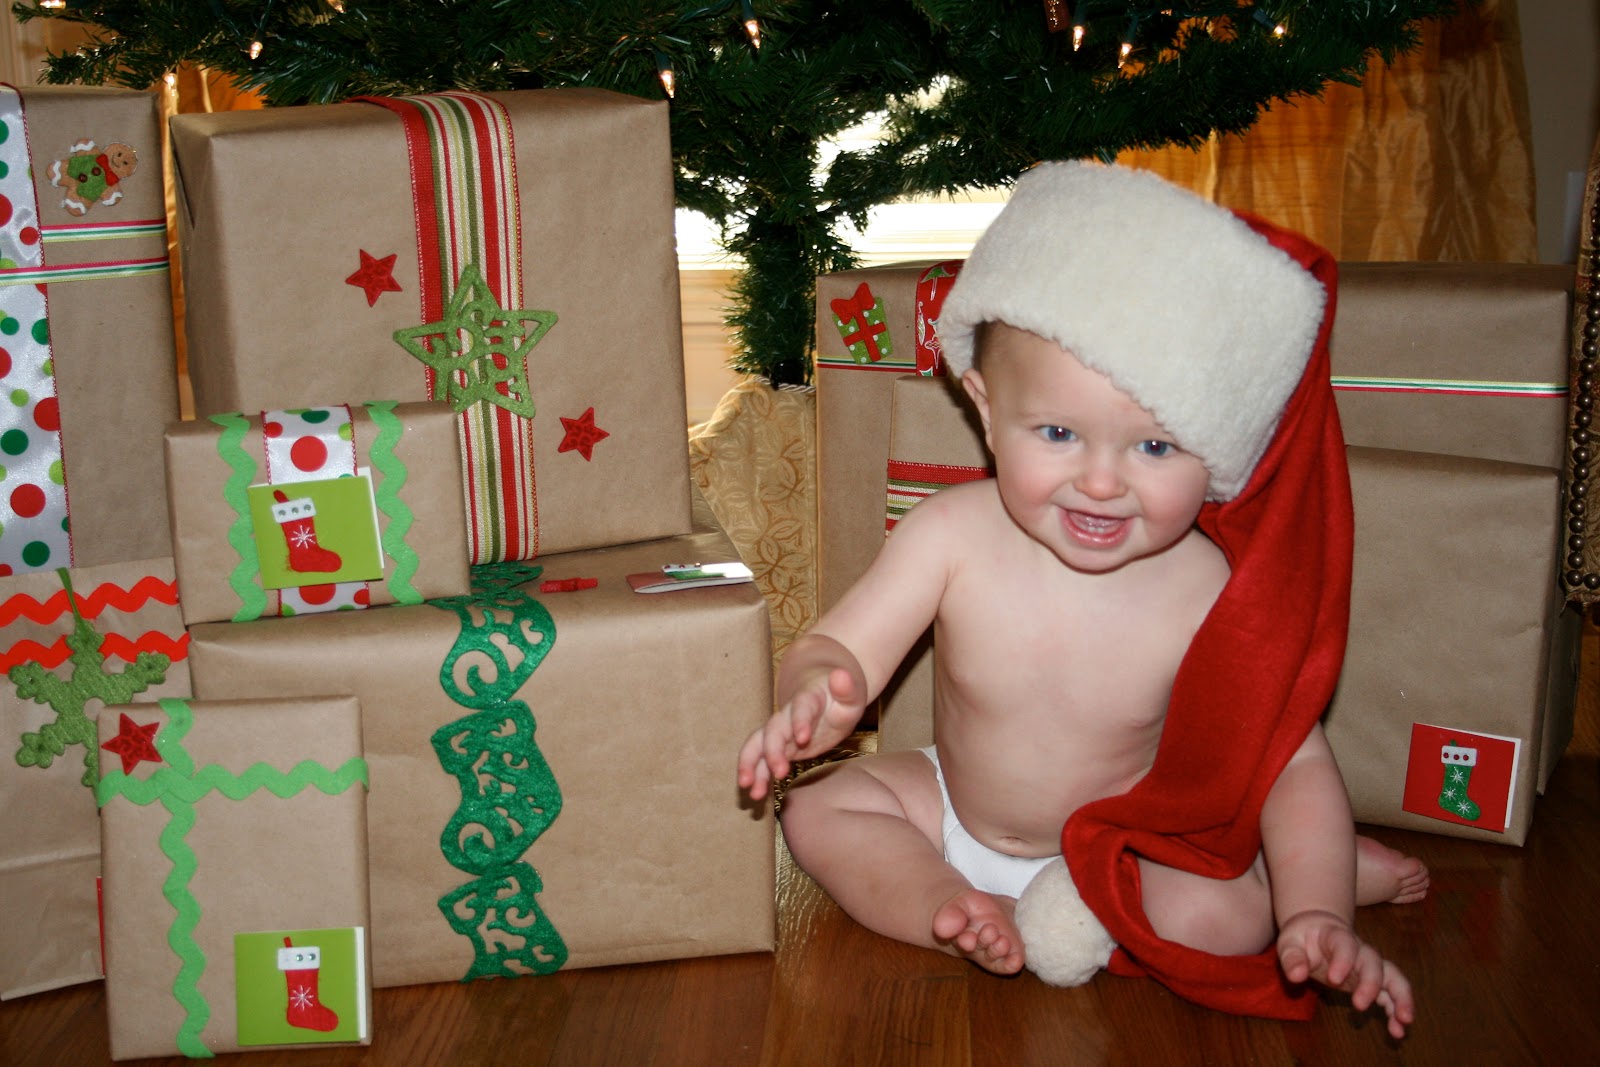
Below is a picture from this year's Christmas tree...if you click the picture it will enlarge it so you can see how I decorated with my old Christmas cards.  Not gonna lie...this year was quick and simple.  I went ahead and posted more pictures below from past years to show you how you can elaborate on the idea...

2007 - You could use your Christmas card cutouts as accent pieces as I did with the stars.

2008 - Not a great picture...didn't have many from this year...must have been pregnant.  It also appears that a one-year-old did most of the stickers...

2009 - Not preggers again quite yet, and look how awesome I did with my decorating!  :-)  Again, Christmas card die cuts would make great accents in place of some of the foam stickers I used.  And yes, those are foam alphabet stickers that I used to put everyone's name on their package.  A wee bit crazy, but oh so cute.

So...this isn't really a tutorial.  It's more of a "see what I did?" and a little heads up on what you can do, too!  (If you save your cards!)


Holiday'd Out!

Friday, December 17, 2010

Kids' Gift Idea for Friends

Part of Christmas for us this year is teaching our 3 1/2 year old that it is NOT. JUST. ABOUT. GETTING. TOYS.

A concept he has yet to fully grasp as he drools over every toy he sees in a magazine, at a friend's house, or on TV.  I'm exhausted from listening to his incessant whining about it.  And I can often hear a haunting, "Just wait 'til you have kids," in the back of my mind.  Yes, I'm sure this is some form of payback from my own childhood, but I feel it is also just a normal challenge with children of this age.

So, part of our teaching method was to get him in the spirit of giving by making and giving gifts to his friends at school.  I wanted something he could fully take part in AND was something kids would be excited about getting...AND I didn't want to spend a fortune.

I started by stealing a play dough recipe from Clinton's teacher's website.  Then I ventured out to Joann's and found some supplies to give our craft that extra Christmas touch.

We started our project by making play dough.  It's truly this simple...

Mix ALL ingredients together in a pan as shown below:
2 C. flour
2 C. water
2 T. oil (I used canola)
1 C. salt
4 T. Cream of Tartar (Make sure you have enough before you start, 4 T. is more than you think!)

Once mixed together, cook over medium heat.  I stir mine occasionally because it makes me feel better.  Clinton also likes this task.


As it cooks, the dough will start to ball up and pull away from the pan.  Keep it over the heat until you can touch it without it sticking to your hand.

You can dump the dough out onto your counter top.  PUT PARCHMENT PAPER UNDER THE DOUGH IF ADDING FOOD COLORING...we did this a few steps later.  :-/  Add desired food coloring...and keep adding...and keep adding...until you reach your desired shade.  I think we used about half a bottle of color for each batch.

Knead the dough until the color is evenly distributed throughout the dough.

We finished with one batch of red and one batch of green.  I also find the color darkens a bit as the dough cools.

Clinton has eight kids in his class, so we divided each batch into 8 balls.

Then I used some Wilton Treat Bags to bag up the dough.  (I got these at Joann's)

I also found these at Joann's, and they were already 60% off!

I also found this at Joann's.  There are 50 animal shaped cookie cutters inside.  I only needed 8, but we use cookie cutters for a lot of things around here and I couldn't beat the price.  It was $10 and I used a 40% coupon they sent me, making it $6.

Then I bagged up one green dough and one red dough into each Santa bag.  I taped a cookie cutter to the bottom.  And attached a tag to the twistie tie.  Easy.  Not expensive. And they appeared to be well received.

And my kids have been loving the the other 42 cookie cutters.  Heidi Sage likes to pull them out one by one and name each animal (or have me do it)!  Clinton likes to cut out two different kinds of animals and make them fight....hmmm.

Christmas Crafting,


Linking to...
Keeping It SimpleMaking

Friday, November 26, 2010

The Advent Season Craft

At 3 1/2 Clinton is understanding more and more about this crazy world that surrounds him.  As I watch him fully grasp concepts and ideas, I find it increasingly important to focus on the concepts and ideas that we value in our home.

And one thing we value is the meaning of Christmas.  Clinton knows full and well that Christmas means Santa and snow...and TOYS!  Every day for the past few weeks he has woken up, looked out the window, and been disappointed there is no snow...he seems to think snow = Christmas...and Christmas = toys.

Anyway, as I've watched him focus more and more on the idea of toys and gifts, I've felt more and more of an urgent need to focus on the MEANING of Christmas.  I started looking for some way to accomplish this.  I found a number of ideas, and finally settled on this one.

I found this book, The Advent Jesse Tree, on Amazon.  I liked it because it's a book we can use year after year, as it follows the 25 days of December vs. a true advent calendar which changes annually.  I also liked it because each day consists of a Bible scripture, a children's devotional, an adult devotional, and a symbol.  And I liked it because not every day is about the story of Jesus' birth...in fact, it covers the main stories throughout the Old Testament leading up to Jesus' birth.  The point is to show that everything leading up to that point was actually designed to lead up to just that point in time.


This discussion questions may still be a bit much for Clinton, although after reading through the book I think he'll understand quite a bit of it.  I think it also helps the little ones that a symbol is given to each day.

The book asks that you use the given symbol for each day to create an ornament that goes on a dedicated tree.  I decided my Applesauce Cinnamon ornaments would do just the trick.  I went through the list of symbols and found simple patterns for each on the web.  I printed and cut them out.  (If you'd like to use my file of symbol patterns, shoot us an email at dressingheidisage@gmail.com and I'll send them to you!)


In order to do all the symbols, it really does take two batches of the dough.  They do better if they're not too thin and you really would have to make them quite thin to get all the symbols out of one batch.

Once the dough was mixed up and rolled out, I started cutting out my symbols.  I just laid the patterns on top and cut out with a sharp ended knife.


Patterns/symbols that I felt would benefit from some dimension, I cut apart and cut out separate pieces that could be stacked and glued together once they were baked.

Other symbols were perfectly fine as just a "silhouette".

After I cut them all out, I baked them according to the tutorial.  (This is not my best batch.  I did them a little thin and let them cook overnight...which meant they didn't get flipped often enough...Oopsie.)

I found this set of 3 baskets on Clearance this week at JoAnn's for $8.97.  I knew these would work perfectly for how I wanted to organize my project.

I used the smallest basket to hold all the ornaments.  I used the medium basket to hold all of our Bible story books that I found around the house.  I thought it might be interesting to have some different ways of telling the stories.  And I used the big one for all of our art supplies.  In my basket I have pom poms, ribbon, yarn, craft buttons, a sample set of glitter, a sample set of sequins, google eyes, rick rack, paints, paint brushes, Mod Podge, and some plastic containers for Mod Podge and paints.


 I then cleared off some space on the buffet in the dining room for my baskets.  My plan is to do a devotional each day.  Then we will decorate the corresponding ornament for that day.  And as soon as I get my smaller tree out of the garage, I'm going to set it up in the dining room and it will be designated just for our Advent ornaments.  For Heidi Sage, I'm printing the symbols on paper and let her color, paint, or glue them as she pleases.  At 38 weeks pregnant, I just didn't have it in me to make two sets of ornaments.  (If you'd like the file of printable ornaments, shoot us an email at dressingheidisage@gmail.com and I'll send you the file.)

I also bought this nativity scene toy for the kids and I to play with.  I'm planning on getting it out at the beginning of December and placing it with our Christmas books.  That way as we're reading the stories, we can play along with the toy.  

At the very latest, I should be home from the hospital on December 1...so this should all work out just fine.  We'll see....I'm just hoping Baby #3 is as good of a baby as 1 and 2 were!

Ready for the Reason!