Showing posts with label Christmas. Show all posts

Tuesday, November 29, 2011

Activity Advent

Advent is different to different people.  It's different between families.  Different between denominations.  And maybe even different between family members.  I still have a very basic, "Sunday School" education of the religious advent experience so I am not here to elaborate on that (although I will probably be diving into that for my own personal benefit).

This year I wanted to do an Advent Calendar for my kids.  I didn't want to give them candy everyday, because quite frankly we're still trying to get through that mess from Halloween.  I couldn't give them a gift everyday because that's expensive.  So, I decided to go with the idea of an activity advent.  This is not an original idea, but I did make up my own list.

There are a number of ways you could set yours up.  Martha has some great ideas that you could use and easily incorporate a written note with an activity.  I personally will be going with some simple, but cute envelopes.  That's just all I have time for right now, and it will be enough for my 1, 2, and 4 year olds.

We have made a real concerted effort this year to talk less about Santa and more about "Jesus' Birthday".  I don't mind sharing the spirit of Santa with my kids, but I don't want the real meaning of Christmas to be lost either.  We've been talking a lot about Jesus' Birthday and how we're going to have a party for Him on Christmas.  I have plans of decorations, cupcakes, etc.

So my list is more geared in this direction, with exceptions.  We have a few that are about doing for others (but we'll incorporate conversation about how Jesus did for others) and a few that are just about some of the fun things to do at Christmas.  Here is the list I came up with.  Feel free to make changes that suit your family.  AND FEEL FREE TO SHARE SOME OF YOUR ACTIVITY IDEAS.  We'd love to hear other things, too.


  1. Using your nativity set, share the story of Jesus' birth day with Daddy.  Then let Daddy read the story back to you from your Bible.  (I'm going to be on a short girl's trip the first 3 days, so I had to make ones Daddy could do.)
  2. SCAVENGER HUNT (I have a Hallmark series started for each of the kids from their birth year. I've bought these for this year, wrapped them, and hidden them.  They'll get to do a scavenger hunt for them, open them, and hang them on the tree.)
  3. Using our new nativity stamps (found these at Joann's; the foam ones you use with paint), paint a picture of Jesus' birth day to hang on the mantle for His party.
  4. Take a drive or walk tonight just to look at Christmas lights.  Don't forget to ask mommy and daddy for some hot chocolate!
  5. As we get ready for Jesus' Birthday Party, we will surely need some party garland.  Let's make lots of paper garland to string around the house.  (You know the kind.  Just strips of paper glued into circles interlocking with the next.  I got a book of Christmas paper at Hobby Lobby.)
  6. Just as each of your have for your Birthday Party, let's make Jesus a banner for his.  It should read, "Happy Birthday, Jesus".  (Much like this, but not in a pirate theme.)
  7. With help from mommy or daddy, come up with a Christmas prayer to pray each night.  Think of all the Christmas things you want to thank God for, and all the different people you want to pray for during this time of year.  Mommy or daddy will write it down and we can read it together every night.
  8. Make a special Christmas treat to deliver to a friend.  (Think simple.  Chocolate covered pretzels.  Chocolate covered marshmallows.  Etc.)
  9. Make a special Christmas card to mail to a friend.  Ask mommy to help you address it and stamp it, then put it in the mailbox outside.
  10. Make a special Christmas treat to take to your teachers.
  11. With mommy and daddy, make brown bag dinners to take and deliver to homeless people.  You may even have to go to the grocery store and help mommy shop!
  12. Make a birthday card for Jesus.  We'll put it in a special place for his birthday party!
  13. Make a Christmas card to send to a special family member. 
  14. Tonight's the big night!  We're all going to Clinton's Christmas Concert at church!  (Clearly, this is very specific to us.  Clinton was old enough this year to join the Angel Choir at our church...we can't wait to see him perform!)
  15. Make special gifts for your friends at school.  (We may do the same as last year, or we may come up with something different...like this adorableness.)
  16. Make a special doggy treat for Gracie.  Even dogs should get to celebrate Christmas with something yummy!
  17. Put on a Christmas play for mommy and daddy.  (Ha!  We'll see how this goes!)
  18. Make a gingerbread nativity.  (I thought this was a great alternative to a Christmas classic.  There's no tutorial here, but it didn't look like rocket science.  I'll post my own tutorial once we do ours.)
  19. Decorate gifts.  (Have I ever mentioned my love for wrapping everything in brown craft paper?  I'm going to let the kids paint with their nativity stamps.  Add old cards.  Add jingle bells.  Etc.  More to come on this.)
  20. Gather all the change you can find around the house.  Then mommy is going to drive you around until you find a red bucket with a bell ringer.  They are collecting money for kids and we're going to give them everything we found!
  21. Go see a movie!  ...at the big movie theater! ...with POPCORN!  ...and SPRITE!  (Probably Happy Feet 2.  Not a Christmas movie.  But we're all psyched about it and it will be a nice treat.)
  22. Make reindeer food for Santa's reindeer.  We want to make sure they find our yard and get a good snack!  (There are umpteen variations of this.  Here's just one.)
  23. Make cookies for Santa.  Mommy has all the special ingredients to make Santa's favorite cookies.  Let them get good and cool because tomorrow we'll be adding to them.  (BTW--if anyone has a wheat free sugar cookie recipe they'd like share, I'm in need!)
  24. Decorate Santa's cookies.  Mommy has lots of special supplies ready for you to make Santa's cookies extra special.  (This will include icings, sprinkles, gum drops, jelly beans, etc.  Things that will make their eyes light up.)
  25. Now today is such a special day because it is Jesus' birthday!  Before you open up this gifts for you, let's sing Happy Birthday to Jesus and remember he is the reason for Christmas!


*Notice to all readers.  Items on this list could change at any time without prior notification.  Items on this list may not work for everyone, so feel free make changes.  ;-)

Hope this gets you thinking about how to get your kids in the spirit!  I know I'm hoping to get Clinton talking about something other than NEW TOYS!  :-D

Let the Season Begin,

Wednesday, January 5, 2011

Ruffle Pants and Top

Heidi Sage and the boys had a whole Christmas wardrobe this year.  This particular outfit was in Heidi Sage's line up; however, the only thing Christmas-y about it was the fabric.  SO, that means you could use any adorable fabric to make this outfit for your little cutie...maybe something she could wear longer than a month.

I found the onsie at Dillard's and ordered the fabric online last year.

I used a very simple straight jumper pattern for the top and looked through my patterns for a simple pants pattern.  The jumper was a little short for Heidi Sage so I had to lengthen the pattern just a little.

I cut the Jumper lining out on plain white fabric.

When cutting out the pants I measured Heidi Sage from the waist to the floor and then shortened the pattern so I could add a ruffle on the bottom of the pants.

I cut the ruffle 2 times the width of the bottom of the pants.  This ruffle is 4 inches before hemming and gathering stitches.

I also cut some bias strips for some additional decorations.

And made them into bias tape.

I sewed the front and back of the pants together and also the outside side seams. 

Next, I hemmed the bottom of the ruffle then added the ruffle to the bottom.  

Next, I added the bias tape above the ruffle and then sewed up the inside seam of the pant leg.  

I sewed a casing at the top of the pant and added the elastic, finishing up the pants.

Now the Jumper Top.  I pinned the front and back of the jumper together and sewed the SIDE seams together.  I did the same step for the lining except I left a 4 to 5 inch opening on one side of the lining.  This is to be used for turning the jumper.  At this time I ironed the side seams open so they were good and flat.

With right sides of fabric continuing to face each other, I opened the top with the lining fabric, pulled it over the pretty fabric top, and sewed together the TOP seams of the jumper.  After sewing around the neck, shoulder straps and arm holes, I trimmed away the extra fabric and clipped the neck so when I turned the pieces they would lay flat. 

After turning I pressed the top.

Once the top of the jumper is turned and pressed you need to sew the hem.  This step is tricky and it looks like it's not going to work out, but it does.  Start with the jumper pressed and laid out as in the above picture.  In the above picture the printed fabric and the lining fabric are laying wrong side to wrong side.  In order to sew the hem with no raw edges you need to match the right side of the printed fabric to the right side of the lining fabric.  To do this you must work through the 4-5" slit that you left on the side seam of the lining.  Reaching through the slit you will match the right side of the printed fabric to the right side of the lining a little bit at a time and pin.  You need to make sure when you are pinning that your side seams are matched up so that the hem will be straight.  The below picture shows part of the hem pinned.  You need to work bit by bit until the entire hem is pinned as the next picture shows.


Once you have pinned the whole hem you will sew a 5/8" seam around the bottom.  Like with the pinning, you will work slowly and sew a 5/8" seam around the bottom.  You may have to scooch and scrunch fabric to get the part you are sewing to lay flat on the sewing machine.  Make sure when you're scooching and scrunching fabric that you have the sewing maching needle in the down position (through the fabric) so that it doesn't break your line of stitches.  Once you have sewed around the enitre bottom, remove pins and turn jumper right side out through the side seam hole.  When you are turning the jumper inside out be patient and work a little bit at a time so that you don't rip your side seam.

Press the hem flat and hand stitch the lining side seam together.

For extra decoration I cut a 2 inch strip of fabric added some bias strips and gathered it through the center.  This piece was 2 times the length of the top section of the Jumper.  I top stiched accross the top.

I decided to use covered buttons.  I used the instructions that came on the back of the button package.  I made button holes for the size button I was using.

I also mad a matching hairbow.

And it made for one cute little/big sister!


Sew Happy,

Linking to...
Make it Yours @ My Backyard Edengiveaways

Friday, December 31, 2010

What's Old Is New Again

I find it interesting to watch my daughters as adults.  I know they were both raised under the same roof, with the same parenting, and the same opportunities...yet there are some striking differences between the two.

Chelsea is typically on the cutting edge of everything fashionable and trendy.  As you look through a current fashion magazine, you might see what some of her current outfits look like.  She loves shopping at high end department stores, boutiques, and, of course, Target...because doesn't everyone shop there?

Courtney, on the other hand, is more traditional and classic.  She's not super trendy...or spendy.  When it comes to toys and furniture, she loves old things.  If she has money burning a whole in her pocket, you can usually find her scouring antique and junk stores for a hidden treasure.  She loves the idea that something had a whole other life before it got to her and that it's getting to live another one with her.  She's also quite sentimental and loves quality heirloom pieces from our own family.  This became increasingly evident as she started putting toys together for Heidi Sage.

I had a couple of "hidden treasures" tucked away that I decided to fix up and give to Heidi Sage for Christmas.  I was certain Heidi Sage would love it and I knew Courtney would appreciate it.

The girls each had a Cabbage Patch doll when they were little along with a bunch of handmade clothes their Grammy and I had made for them.  I held onto these hoping there might one day be some granddaughters to enjoy them.

Courtney's doll had definitely suffered some wear and tear love.  :-)  This required some washing and restitching...


It wasn't long before our little baby doll was looking new again.

I was also able to wash and repair the old outfits for the doll.


As I was working on this, Courtney called one day very excited about a new "hidden treasure" she had found at one of her favorite antique stores.  She was wanting to get Heidi Sage a stroller, but couldn't find one that coordinated with her bedroom and play kitchen....have I mentioned how much Courtney likes things to coordinate???

While making one of her routine stops, she came across this carriage.  The lady who owned the booth happened to be there working that day.  Her and Courtney started talking about what it would be used for and the lady was so touched by Courtney's love for everything old that she told her she could take 20% off the price...and if you know Courtney, you know she's a sucker for a sale...or a discount.  Just ask Rodney.

So, with 20% off, a "classic" look, an untold story, and a paint color that nearly perfectly matched the walls in Heidi Sage's room, Courtney couldn't walk away without it.  I decided I would buy it from Courtney, fix it up, and make it part of Heidi Sage's Christmas gift with her doll and clothes.

I started by making a bumper pad to go around the inside with some leftover fabric I had from another project.

Nothing beats a custom fit.  :-)

Then I made a flat pillow to go in the bottom using the same fabric.

To finish it off, I made a small blanket.  Heidi Sage believes every little girl should have a special blanket, and this blanket has not left this baby since she got it.  :-)

Do you have a "hidden treasure" that just needs a little love to be new again?   Start looking around, you might be surprised what you will find....and how much someone will love it!

Treasuring Memories,

Linking to...
Keeping It Simple

Wednesday, December 29, 2010

Don't Throw Out Your Christmas Cards!

I tried something this year that turned out to be a great idea.  I didn't want to blog about it until I knew for sure, but now I know...

While you're putting away your Christmas decor (as I have been working on for the past two days!), don't throw out those cards your friends and family have so lovingly picked out, signed, and sent to you. Instead, just put them away with your Christmas decorations.  Rubber band them together and put a sticky note on them that says, 

"Visit dressingheidisage.blogspot.com for a reminder of what to do with these."  :-)  

We'll do a more in-depth "how-to" next November.

I used them to decorate my Christmas packages.  There are two different ways you can go here. 

You can use die cuts, as you see below.  OR you can find some that have cute graphics that are easy to cut out and use those.  This is a great way to "recycle", but also a way to save some moo-lah next year when you start purchasing gift wrapping supplies.

I have a couple of rules about Christmas wrapping.  First, ALL gifts must coordinate.  Some call it OCD, others (...and by "others", I mean BRILLIANT people) think it makes for an amazing looking present presentation.  Second, I wrap all my gifts in brown craft paper.  Again, this could be seen as OCD, but I like it because I like my decorations to stand out...and again, it helps make them all coordinate.  When other people start mailing in packages or bringing them in, I can sometimes take a deep breath and allow a different paper under my tree...but I've also been known to rewrap other people's gifts...of course, that was back in the day before I had three children under the age of 4.  :-D

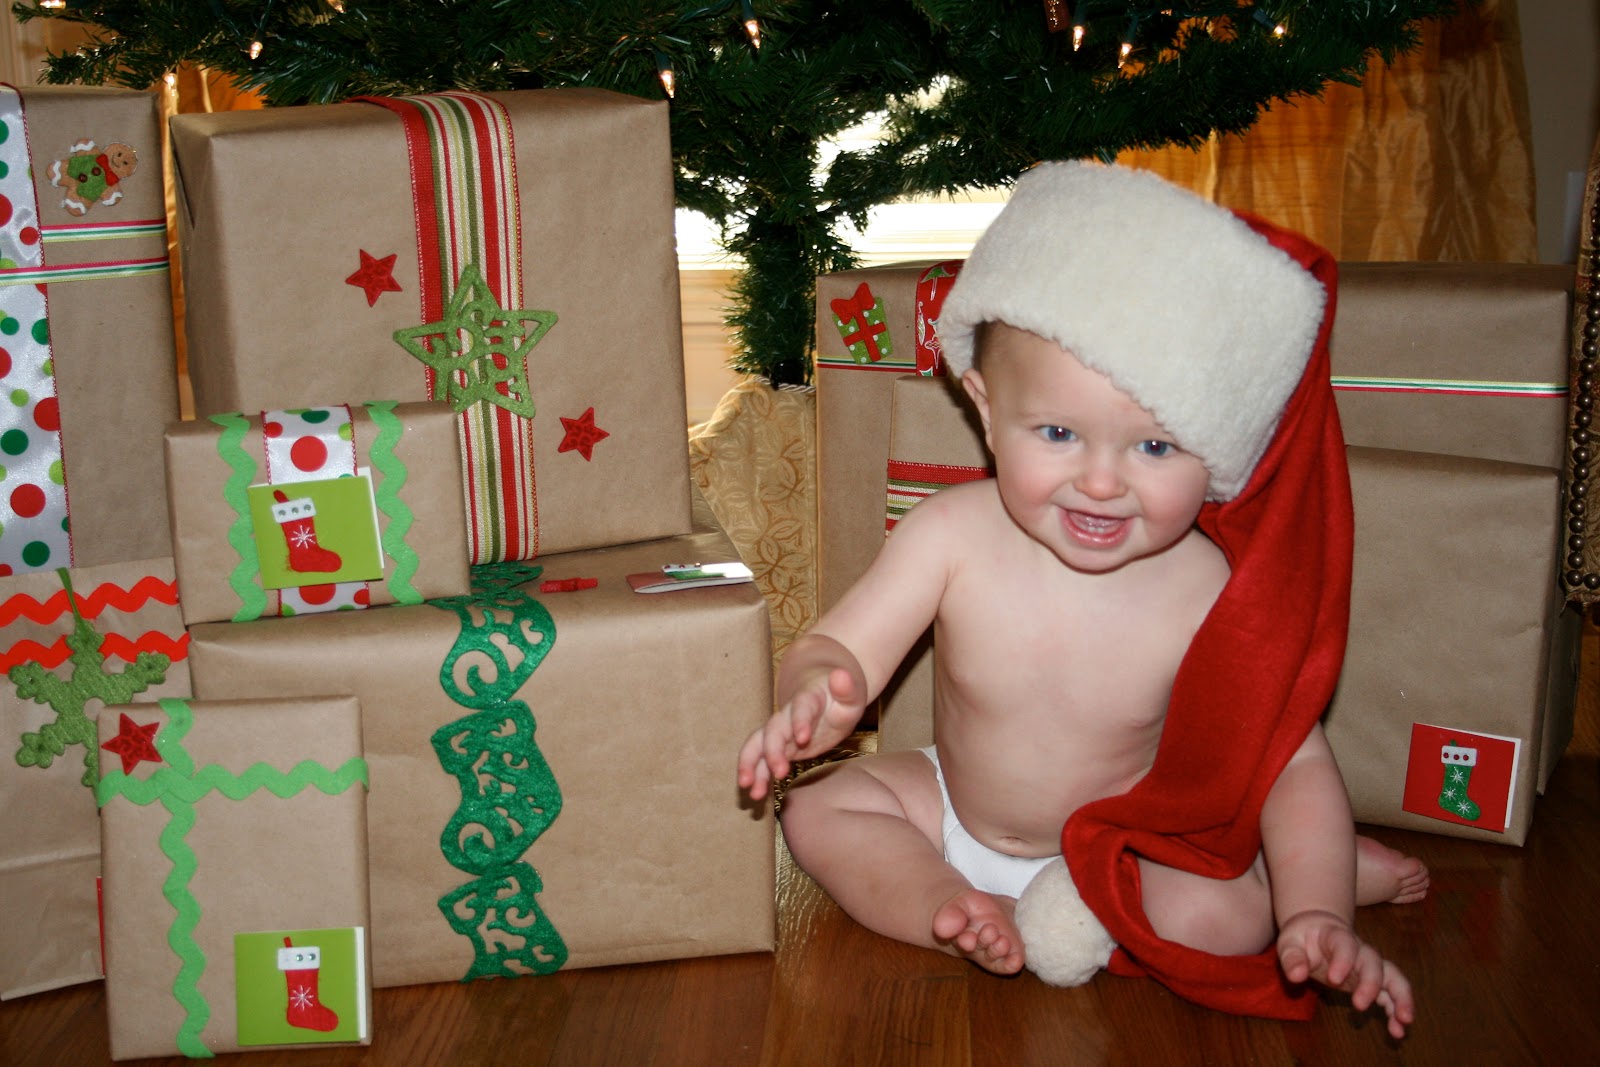
Below is a picture from this year's Christmas tree...if you click the picture it will enlarge it so you can see how I decorated with my old Christmas cards.  Not gonna lie...this year was quick and simple.  I went ahead and posted more pictures below from past years to show you how you can elaborate on the idea...

2007 - You could use your Christmas card cutouts as accent pieces as I did with the stars.

2008 - Not a great picture...didn't have many from this year...must have been pregnant.  It also appears that a one-year-old did most of the stickers...

2009 - Not preggers again quite yet, and look how awesome I did with my decorating!  :-)  Again, Christmas card die cuts would make great accents in place of some of the foam stickers I used.  And yes, those are foam alphabet stickers that I used to put everyone's name on their package.  A wee bit crazy, but oh so cute.

So...this isn't really a tutorial.  It's more of a "see what I did?" and a little heads up on what you can do, too!  (If you save your cards!)


Holiday'd Out!